Quick Facts
- Ideal Ratio: The most reliable sauerkraut salt ratio is 2% of the cabbage weight (20 grams of salt per 1000 grams of cabbage).
- Probiotic Density: A single two-tablespoon serving of raw homemade sauerkraut can provide up to 300 billion CFUs of beneficial bacteria.
- Fermentation Timeline: For the best flavor and microbial diversity, allow the cabbage to ferment at Room temperature for 21 to 28 days.
- Optimal Temperature: Keep your jars in a space that stays between 60°F and 80°F to ensure the Lactic acid bacteria remain active.
- Health Benefits: Fermenting for at least three weeks can result in three times more beneficial bioactive compounds compared to shorter fermentation periods.
- Essential Tools: You will need a Digital kitchen scale, a Mandolin slicer or sharp knife, and glass mason jars with glass weights.
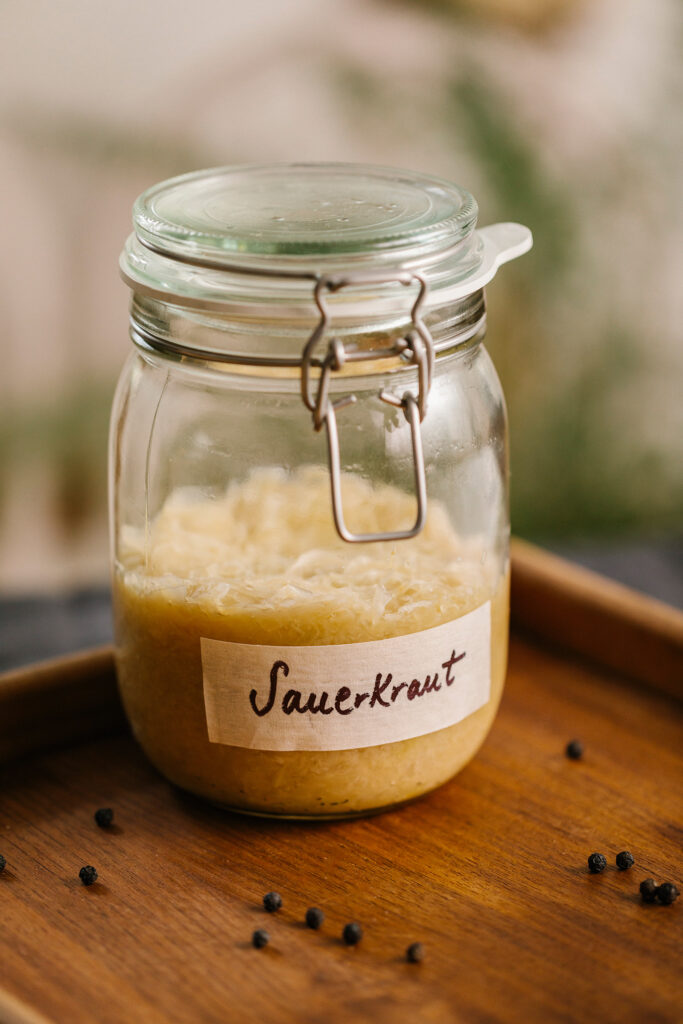
Making homemade sauerkraut is a straightforward lacto-fermentation process where the ideal salt ratio is between 1.5% and 2.5% of the cabbage weight, with 2% being the industry standard for safety and crunch. This precise salinity creates a selective environment that allows beneficial Lactic acid bacteria to thrive while preventing the growth of spoilage-causing pathogens. By calculating sauerkraut salt ratio by weight rather than volume, you ensure a consistent Anaerobic environment that protects your Gut microbiome and yields a superior probiotic product.
The Microbiome Magic: Why Ferment at Home?
As an editor focused on the gut, I am frequently asked if the expensive probiotic capsules in the refrigerator aisle are better than traditional foods. While supplements have their place, the sheer biological complexity of wild fermentation is hard to beat. When you embark on a fermented cabbage recipe at home, you are engaging in a practice that predates modern medicine, using nothing but salt and time to unlock a powerhouse of nutrition.
Most store-bought sauerkraut found on room-temperature shelves has been pasteurized. This heat treatment kills the very Lactic acid bacteria we want for our Gut microbiome. In contrast, raw homemade sauerkraut is a living food. Research shows that cabbage fermented for 21 to 28 days at temperatures between 60°F and 80°F develops a complex profile of probiotics and Digestive enzymes that support nutrient absorption and immune function.
The magic happens through a process called lacto-fermentation. Naturally occurring bacteria on the surface of the cabbage leaves begin to consume the vegetable sugars, producing lactic acid as a byproduct. This acid preserves the cabbage and gives it that signature tang. Furthermore, studies indicate that this process increases the bioavailability of vitamins, making the finished product significantly more nutrient-dense than the raw vegetable started.
Preparation: The Right Salt and Tools
Precision is the hallmark of a successful ferment. To achieve the best results, you must move away from measuring by the spoonful. Different types of salt have different grain sizes; a tablespoon of fine sea salt contains much more sodium than a tablespoon of flaky kosher salt. This is why calculating sauerkraut salt ratio by weight using a Digital kitchen scale is the only way to ensure repeatability and safety.
The best salt for lacto fermentation cabbage is one that is free of additives. I recommend using Himalayan pink salt or a high-quality sea salt. Avoid standard table salt, as the added iodine and anti-caking agents can inhibit the growth of beneficial microbes and result in a cloudy, unappealing brine.
Before you begin, gather your supplies:
- A Digital kitchen scale (essential for the 2% ratio)
- A Mandolin slicer for shredding cabbage for best sauerkraut texture
- Large glass mason jars (wide mouth is preferred)
- Glass weights to keep the cabbage submerged
- A large stainless steel or glass mixing bowl
Salt-to-Cabbage Ratio Reference (2%)
| Cabbage Weight (Grams) | Salt Required (Grams) | Yield (Approximate) |
|---|---|---|
| 500g | 10g | 1 Pint Jar |
| 1000g | 20g | 1 Quart Jar |
| 2000g | 40g | 2 Quart Jars |
| 3000g | 60g | 3 Quart Jars |
Step-by-Step: Your First Small Batch Sauerkraut Recipe
This small batch sauerkraut recipe for beginners is designed to be approachable while maintaining clinical precision. By following these steps, you transform a simple head of cabbage into a jar of Raw probiotics.

Step 1: Prep and Shred
Remove the outer leaves of the cabbage and set one large, clean leaf aside. Core the cabbage and use a Mandolin slicer to create thin ribbons. Shredding cabbage for best sauerkraut texture is key; the thinner the shreds, the easier it is for the salt to extract the Cabbage juice.
Step 2: The Weigh-In
Place your empty mixing bowl on the Digital kitchen scale and tare it. Add your shredded cabbage to the bowl to get the total weight in grams. Multiply that number by 0.02 to find your salt requirement. For example, if you have 800 grams of cabbage, you need 16 grams of Himalayan pink salt.
Step 3: The Massage
Sprinkle the salt over the cabbage and begin to massage it vigorously with your hands. This is where Osmotic pressure comes into play. The salt draws moisture out of the cabbage cells, creating a natural brine. Continue for 5 to 10 minutes until the cabbage is limp and there is a significant amount of Cabbage juice at the bottom of the bowl. This is a great time for adding caraway seeds and spices to sauerkraut if you want extra flavor.
Step 4: Packing the Jar
When learning how to make sauerkraut in a mason jar, the most important rule is to pack it tight. Transfer the cabbage to the jar a handful at a time, using your fist or a wooden muddler to press it down firmly. You want to eliminate all air pockets to maintain an Anaerobic environment. Leave at least one inch of headspace at the top of the jar.
Step 5: Submerging
Pour the remaining brine from the bowl over the cabbage. Place the reserved cabbage leaf on top of the shreds, then place your Glass weights on top of the leaf. The goal is keeping cabbage submerged in sauerkraut jar at all times. Under the brine, everything is fine. If the cabbage is exposed to air, it can develop mold.
Monitoring: Is it Fermenting Correctly?
Once your jar is packed, place it in a cool, dark spot at Room temperature. During the first few days, you might notice the brine rising or even bubbling over; this is why placing the jar on a small tray is a smart move.
You can usually tell how to tell if sauerkraut is fermenting correctly by using your senses. Use this sensory checklist to monitor your batch:
- Visual: Look for small CO2 bubbles rising to the top. The cabbage will lose its bright green color and start to look translucent.
- Scent: After a week, it should smell pleasantly sour and tangy. It should never smell like rotting sulfur or old gym socks.
- Brine: The liquid may become slightly cloudy, which is a normal sign of Lactic acid bacteria activity.
If you see a thin, white, filmy layer on the surface, don't panic. This is likely Kahm yeast, which is harmless but should be scraped off to prevent it from affecting the flavor. However, if you see fuzzy mold (green, black, or red) or if the cabbage has become excessively mushy, the fermentation has failed. When in doubt, throw it out.
Storage, Dosage, and Long-Term Tips
Once the sauerkraut has reached your desired level of tanginess—usually after 3 to 4 weeks—remove the weight and the top cabbage leaf. Screw on a lid and move the jar to the refrigerator. Cold storage significantly slows down the activity of the Lactic acid bacteria, allowing for long term storage tips for homemade sauerkraut that can keep the product fresh for 6 to 12 months.
When you first start eating your homemade batch, go slow. Because it is so dense in probiotics and Digestive enzymes, eating a large bowl immediately can cause a "die-off" reaction or minor bloating as your internal microbiome adjusts. Start with one tablespoon a day and gradually increase your intake.
Remember that this is a wild fermentation, meaning every batch will be slightly different based on the season, the cabbage variety, and the temperature of your kitchen. Embrace the variation—it is the hallmark of true, living food.
FAQ
How long does it take for homemade sauerkraut to ferment?
For optimal flavor and the highest concentration of probiotics, you should let your sauerkraut ferment for 21 to 28 days. While you can eat it after just 7 days, the microbial diversity and the development of beneficial bioactive compounds peak after the three-week mark.
What is the best salt to cabbage ratio for sauerkraut?
The gold standard is a 2% salt ratio by weight. This means using 20 grams of salt for every 1000 grams of cabbage. This specific concentration is high enough to suppress harmful bacteria but low enough to allow Lactic acid bacteria to flourish.
Do you have to refrigerate homemade sauerkraut?
Yes, once the fermentation process has reached your preferred taste, you must refrigerate it. The cold temperature puts the bacteria into a dormant state, preserving the texture and flavor for several months. If left at room temperature indefinitely, the cabbage will eventually become too soft and overly acidic.
How can you tell if homemade sauerkraut has gone bad?
The most obvious signs of spoilage are the presence of colorful, fuzzy mold on the surface, a putrid or "off" smell that is distinct from the normal sour tang, or cabbage that has become slimy and mushy. If the brine has completely evaporated and the cabbage has turned dark brown or black, it is no longer safe to consume.
Is homemade sauerkraut healthier than store-bought?
In almost all cases, yes. Most store-bought sauerkraut is pasteurized for shelf stability, which kills the beneficial probiotics. Homemade versions are rich in live Lactic acid bacteria and enzymes. Furthermore, making it yourself allows you to control the quality of the salt and ensure no unnecessary preservatives are added.